Introduction
This post will be a tad bit different than the usual. It’s regarding continuous integration in Unity3D, since I had to do that recently.
I’ll cut the rant here, and focus on the technicalities.
Unity’s Side
Unity doesn’t provide a command line interface (cli) for generating builds, so you have to add a script yourself first.
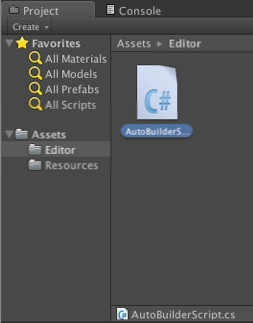
The script is going to be an Editor Script, meaning you must create a new script in the project, and add it to “Editor” directory in the root of the project directory:
The script should contain code to call the build pipeline, and generate the Xcode project. In the code below, I hardcoded the output directory, so you must make sure the directory Builds/iOS exists in the project.
Alternatively, you have use command line arguments code to pass the output directory.
using UnityEngine;
using UnityEditor;
using System.Collections;
using System.Collections.Generic;
using System.IO;

public static class AutoBuilder {

    static string GetProjectName()
    {
        string[] s = Application.dataPath.Split('/');
        return s[s.Length - 2];
    }

    static string[] GetScenePaths()
    {
        string[] scenes = new string[EditorBuildSettings.scenes.Length];

        for(int i = 0; i < scenes.Length; i++)
        {
            scenes[i] = EditorBuildSettings.scenes[i].path;
        }

        return scenes;
    }

    [MenuItem("File/AutoBuilder/iOS")]
    static void PerformiOSBuild ()
    {
        var args = System.Environment.GetCommandLineArgs();
        System.Console.WriteLine(args.ToString());

        EditorUserBuildSettings.SwitchActiveBuildTarget(BuildTarget.iPhone);
        BuildPipeline.BuildPlayer(GetScenePaths(), "Builds/iOS",BuildTarget.iPhone,BuildOptions.None);
    }

}
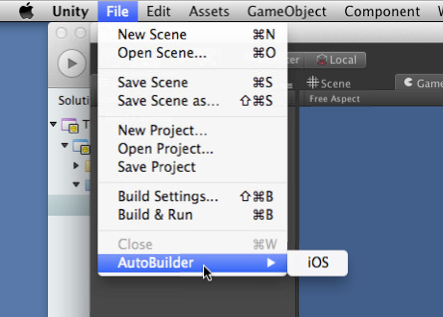
After adding the script above, you will now be able to see an option in the editor to generate the Xcode project:
OK, it’s cool that we have the option to do it through UI, but what if we want to incorporate that with a build script? Simple task.
All you got to do is run the following script:
$ /Applications/Unity/Unity.app/Contents/MacOS/Unity -batchmode -executeMethod AutoBuilder.PerformiOSBuild -quit
Now, you should be able to generate the Xcode project with ease.
Xcode Side
In order to easily build the Xcode project, we make use of nomad-cli, and specifically Shenzhen, to generate the ipa file to be uploaded to our distribution service. Thankfully, It’s a very simple task.
First, make sure you unlock the keychain:
$ security unlock-keychain -p $YOUR_PASSWORD
Then, while in the Xcode project directory, generate the ipa with the following command:
$ ipa build
Wait for it to build, and finally distribute!
ipa distribute:testflight -a APP_TOKEN -T TEAM_TOKEN
Conclusion
Automate away! don’t bog yourself with these tedious tasks, and free up your time for other things!!