This is the fifth part of a series highlighting the process developing a Map Editor for a game. In the previous posts, we looked at the data model that drives the map editor, and how we are generating C++ code automatically using python scripts. As promised, this part will be all about the Cocoa application, that is, the Map Editor itself.
I believe that there is a very interesting relationship between the size of a development team, the scope of the project, and the number of tools and scripts that have been developed for the project. Obviously, as the number of developers in a team increases, the project can afford to set aside some man hours for tool development that in turn contributes the the success of the project. On the other hand, when you have a small team, there isn’t much that you can do except salvage the Internet for tools already developed for you that you can start using immediately. Meh… Let’s just get started with the post already.
YES! Today we will actually see the UI of this so-called map editor! :D. I mean, initially I didn’t want to divert any attention to the Map Editor itself, since the novelty lies in the data driven process of manipulating the Map Editor’s features. Ultimately, I realized there is a lot to learn from the Map Editor UI development side, too. Without further Ado, let us look at how it looks like as of Today!
I thought I’d give a glimpse of the UI before we see the inner details. Mind you, there is no way I can cover all the details exhaustively, but a quick run through all the major components that make this Map Editor possible.
First, I would like to shed some light on the views of the application. We will see the view components in detail, and a little bit of the controller part, too, to get a complete picture regarding the views. Only after we talk about all the views, will we start discussing the application model. So, the first view we will be presenting is the upper left panel that has the basic structure of the map components.
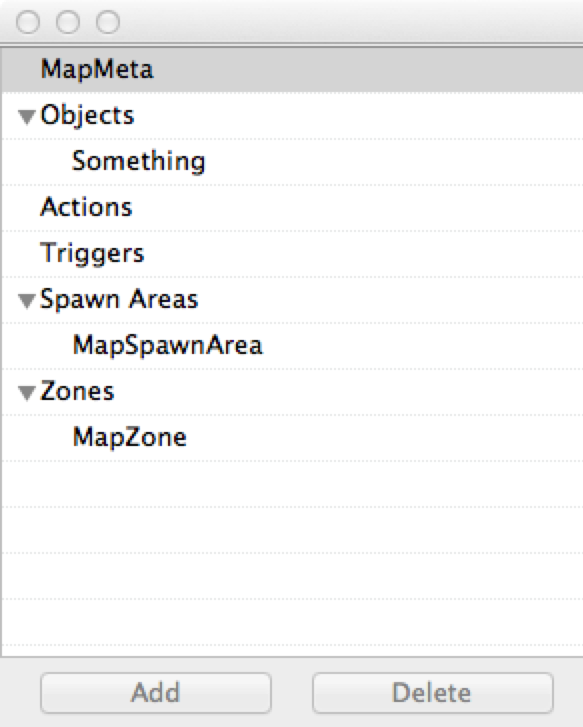
Before we see the code for this component, let me try and explain it at a relatively abstract level. This component is referred to as NSOutlineView. You can provide it with a tree of objects, and it will properly show the objects in a hierarchal fashion. So, when an object has children, it will show the expand triangle to indicate that children exist. That is all there is to it, really. Remember, the UI is not concerned with the implementation details and logic, it is just representing the data for the user.
There are a few things I want to talk about here: How are we supplying the objects to the outline view? How does the outline view know that the object has children, or what to set as the row name?
To answer the first question, we are using an NSTreeController. This class is just another object controller that can handle a tree of objects. You can think of object controllers as predefined controllers (from the MVC pattern) that can automagically connect a model to a view without writing the controller code yourself. Other examples include an array controller, which you can bind to a table view, and BAM! The table view displays the objects that are inside an array.
 With the tree controller representing the model to the outline view, we can then use Cocoa Bindings to say something like: “Hey, outline view. Get the object tree from the controller, and fetch the ‘label’ property from any object inside the tree and use it as the row name”. Yeah, sounds crazy, but that’s how it works!
What was said previously begs the question: But where does this label come from? Excellent question, Bob. I have been talking about object hierarchy and structure, but I never really talked about the object itself. The objects in the hierarchy are actually instances of a custom class called: ECObject. By looking at the structure of this class, you can easily realize that the properties defined are what we bind to the outline view and tree controller.
@interface ECObject : NSObject

/* Label is set by the user and displayed with the object in the renderer */
@property (copy) NSString *label; /* DATA */
/* The fixed class_id or prefab_id this object was instantiated from */
@property (copy) NSString *class_id; /* LINK */
/* The parameters of the prefab */
@property (copy) NSArray *parameters; /* INDEPENDENT */
/* The child prefabs that this instance can instantiate */
@property (copy) NSArray *prefabs; /* CONFIG */
/* The children container */
@property (strong) NSMutableArray *children; /* DATA */
/* The links between subjects and observers. Retained for a reason */
@property (strong) NSArray *links; /* CONFIG */

/* COCOA BINDINGS HELPERS */
/* Is this value fixed or can be changed by the user? */
@property (getter=isFixed) BOOL fixed; /* CONFIG */
/* Can the user delete this instance in the GUI? */
@property (getter=isDeletable) BOOL deletable; /* CONFIG */

/* selection */
@property (getter=isSelected) BOOL selected;
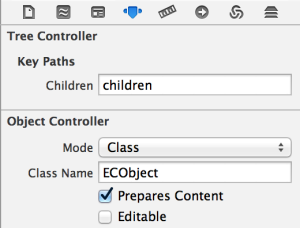
Now, regarding how the outline view knows the object has children, this comes for free when we bound it to the tree controller. The tree controller has to be set up with the property that refers to the children in the ECObject. I also set the object type of the tree controller content to ECObject. Note, the image on the left has been photoshoped for brevity sake.
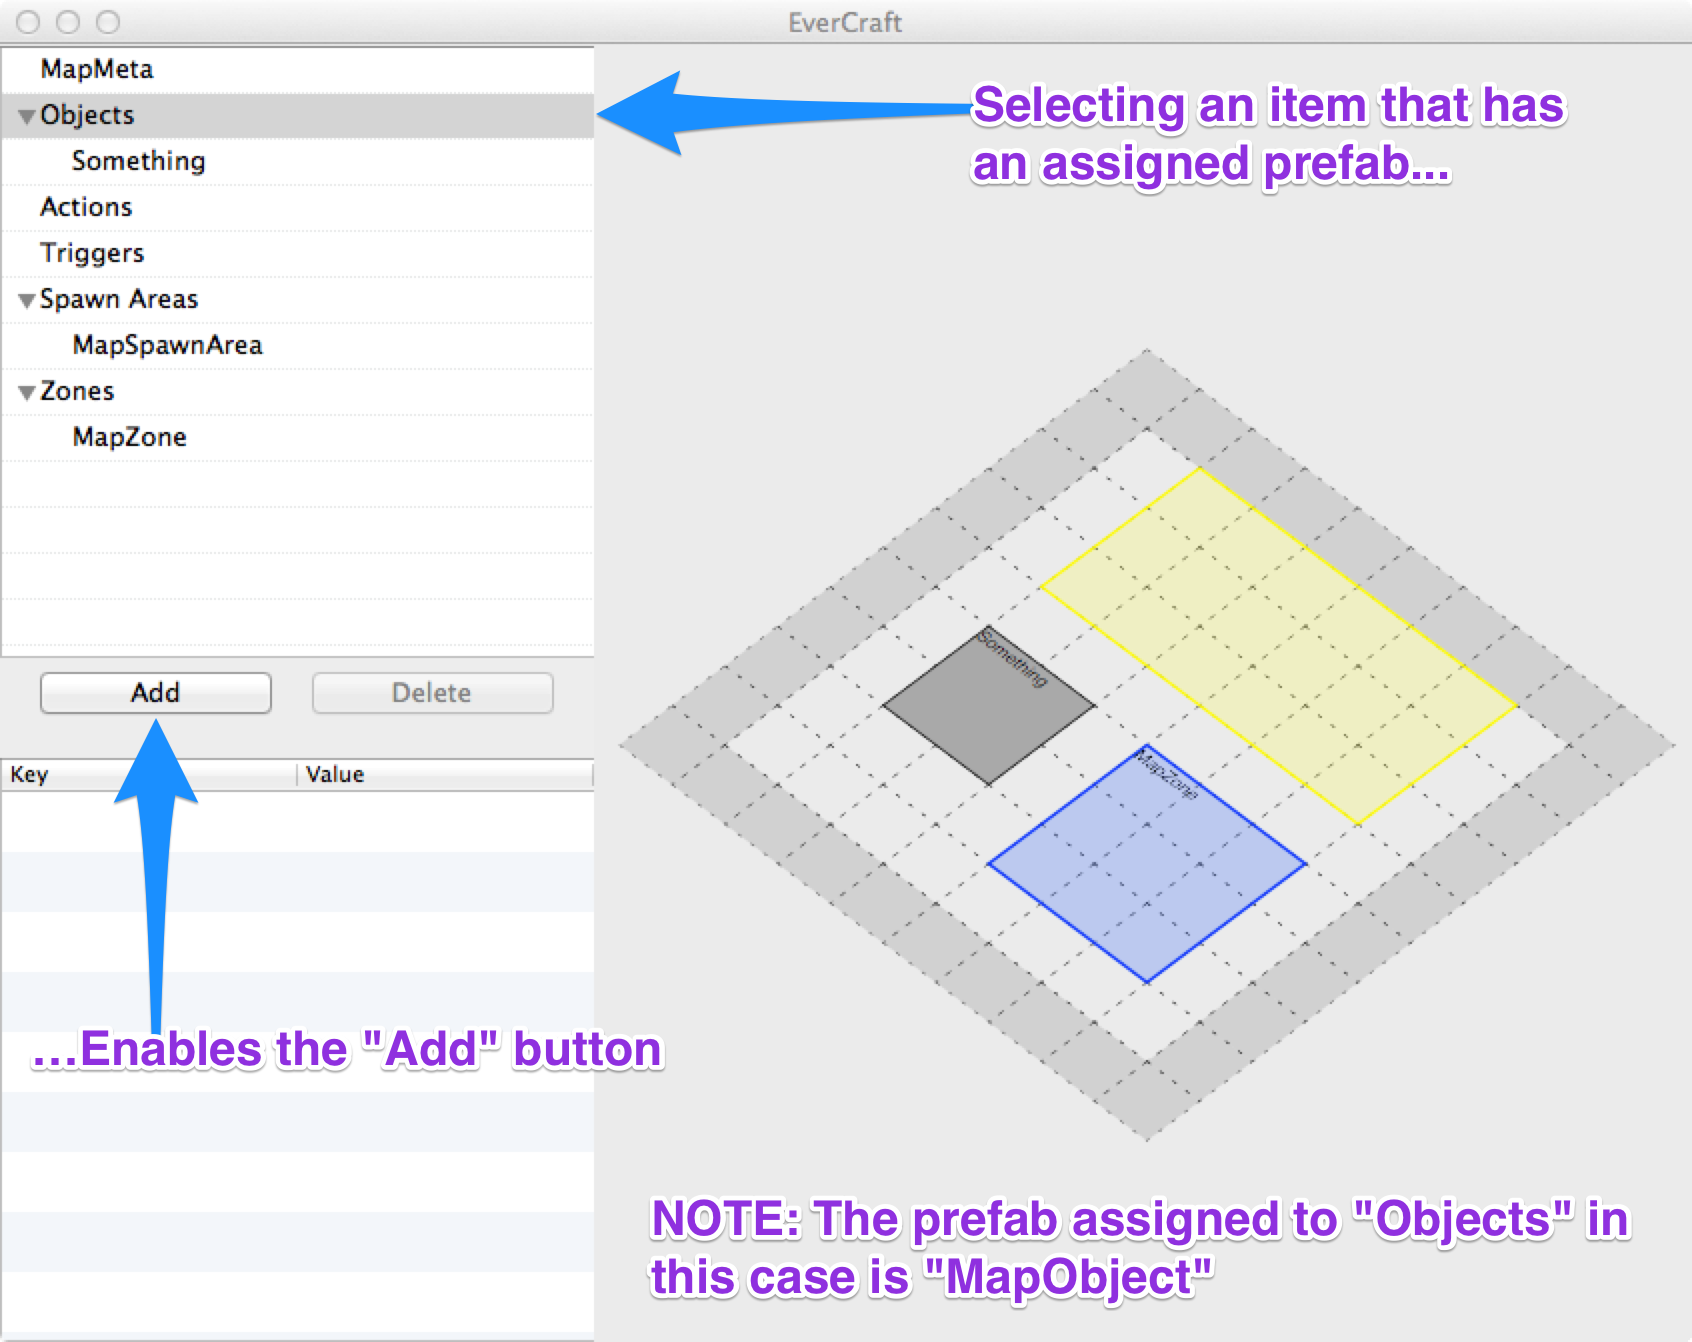
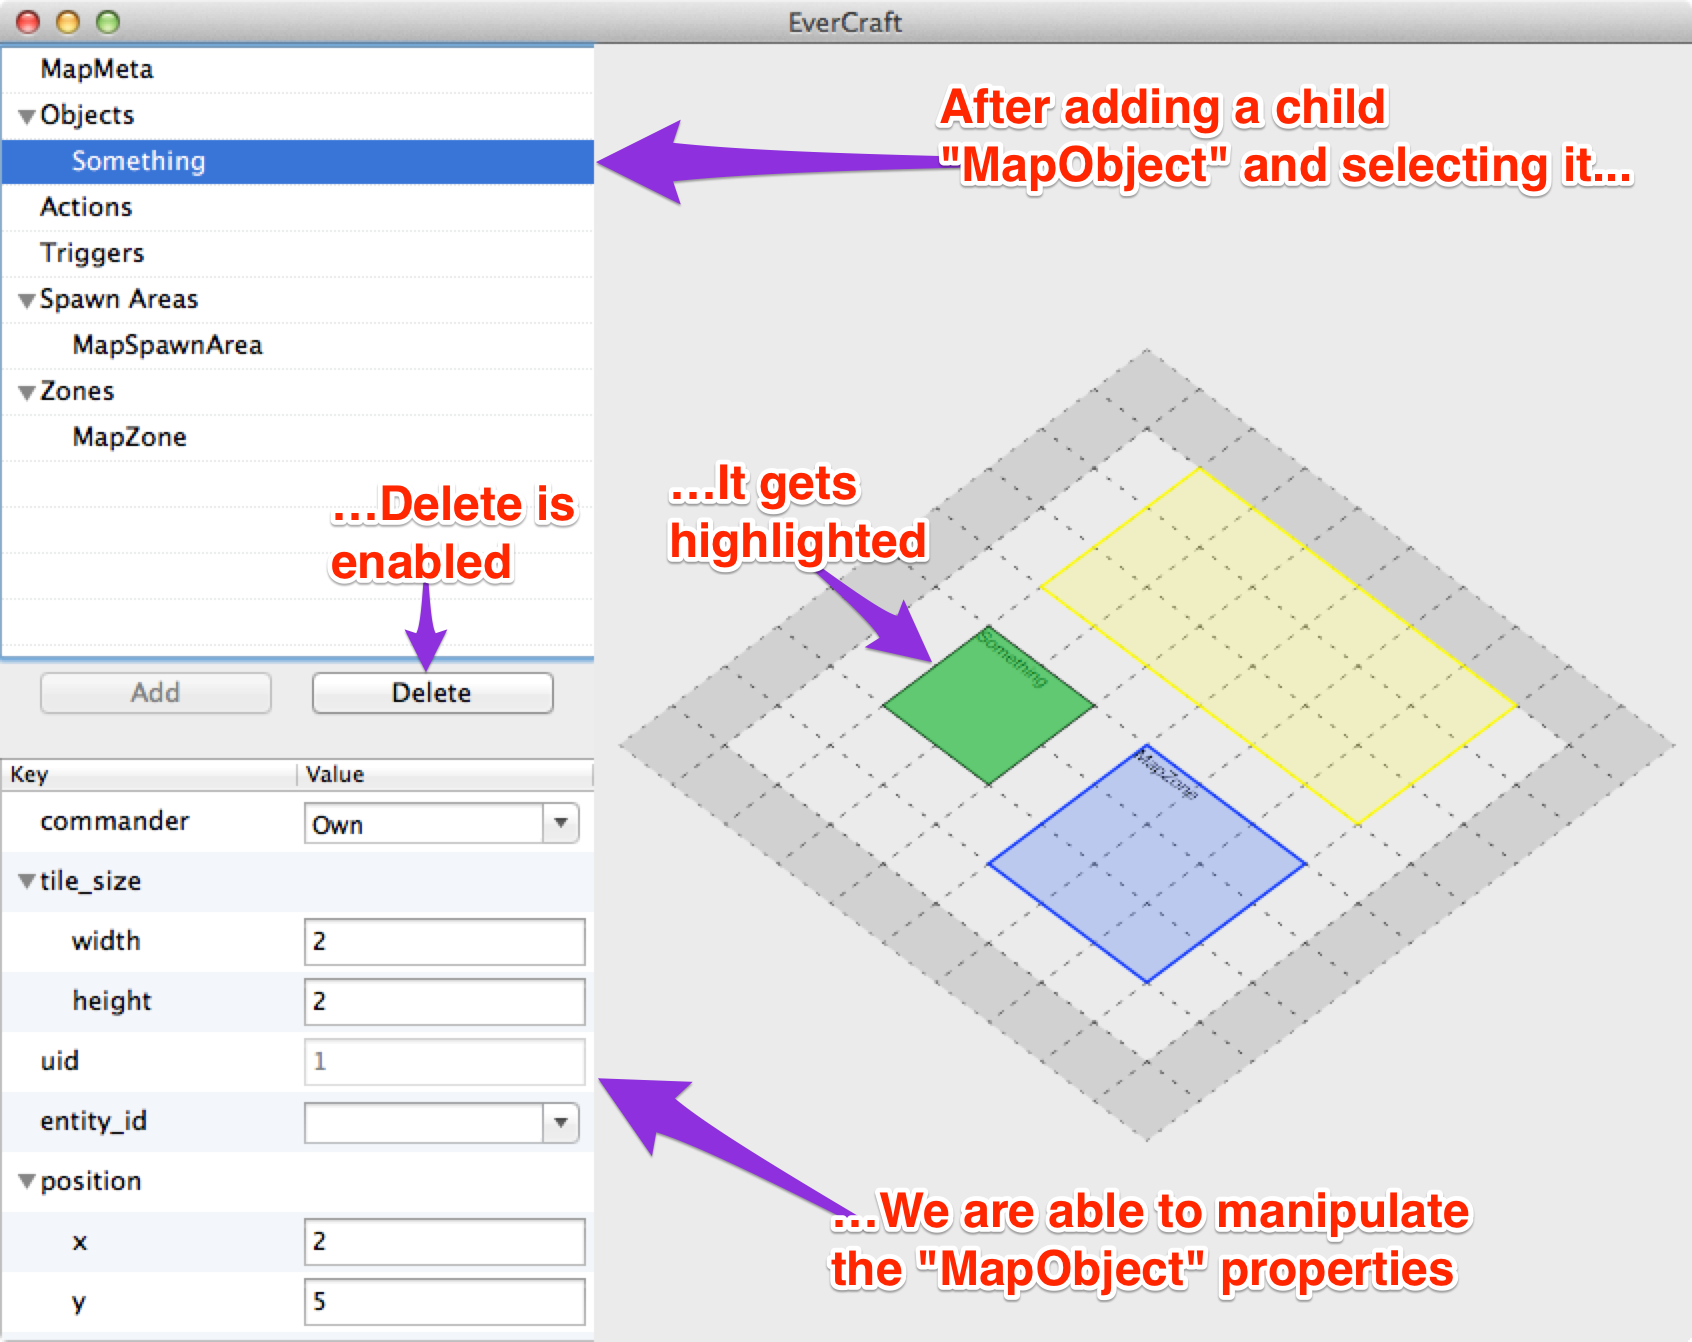
One last thing I would like to cover here are the “Add” and “Delete” buttons. Because I need granular control on adding objects to this outline view, I cannot simply bind the add button to the tree controller (Even though that is possible!!). If we did bind them, what will happen is, an ECObject will be instantiated by passing alloc and then init messages to the ECObject class (a fancy way of saying, [[ECObject alloc] init] is called). That won’t do. We need to allocate the ECObject based on the parent’s prefab property. For example, from the images in the very beginning, “Objects” has a prefab “MapObject”, so we need to allocate an ECObject that has “MapObject” parameters and properties. This is all part of the Model, though, so we will see the details later. The important point here is, we enable “Add” if the ECObject has prefabs, and clicking “Add” will display the prefabs for the user to choose from. After choosing a prefab, an ECObject is instantiated from the prefab and added as a child of the selected ECObject. Delete is simply enabled if the deletable property is true on the ECObject.
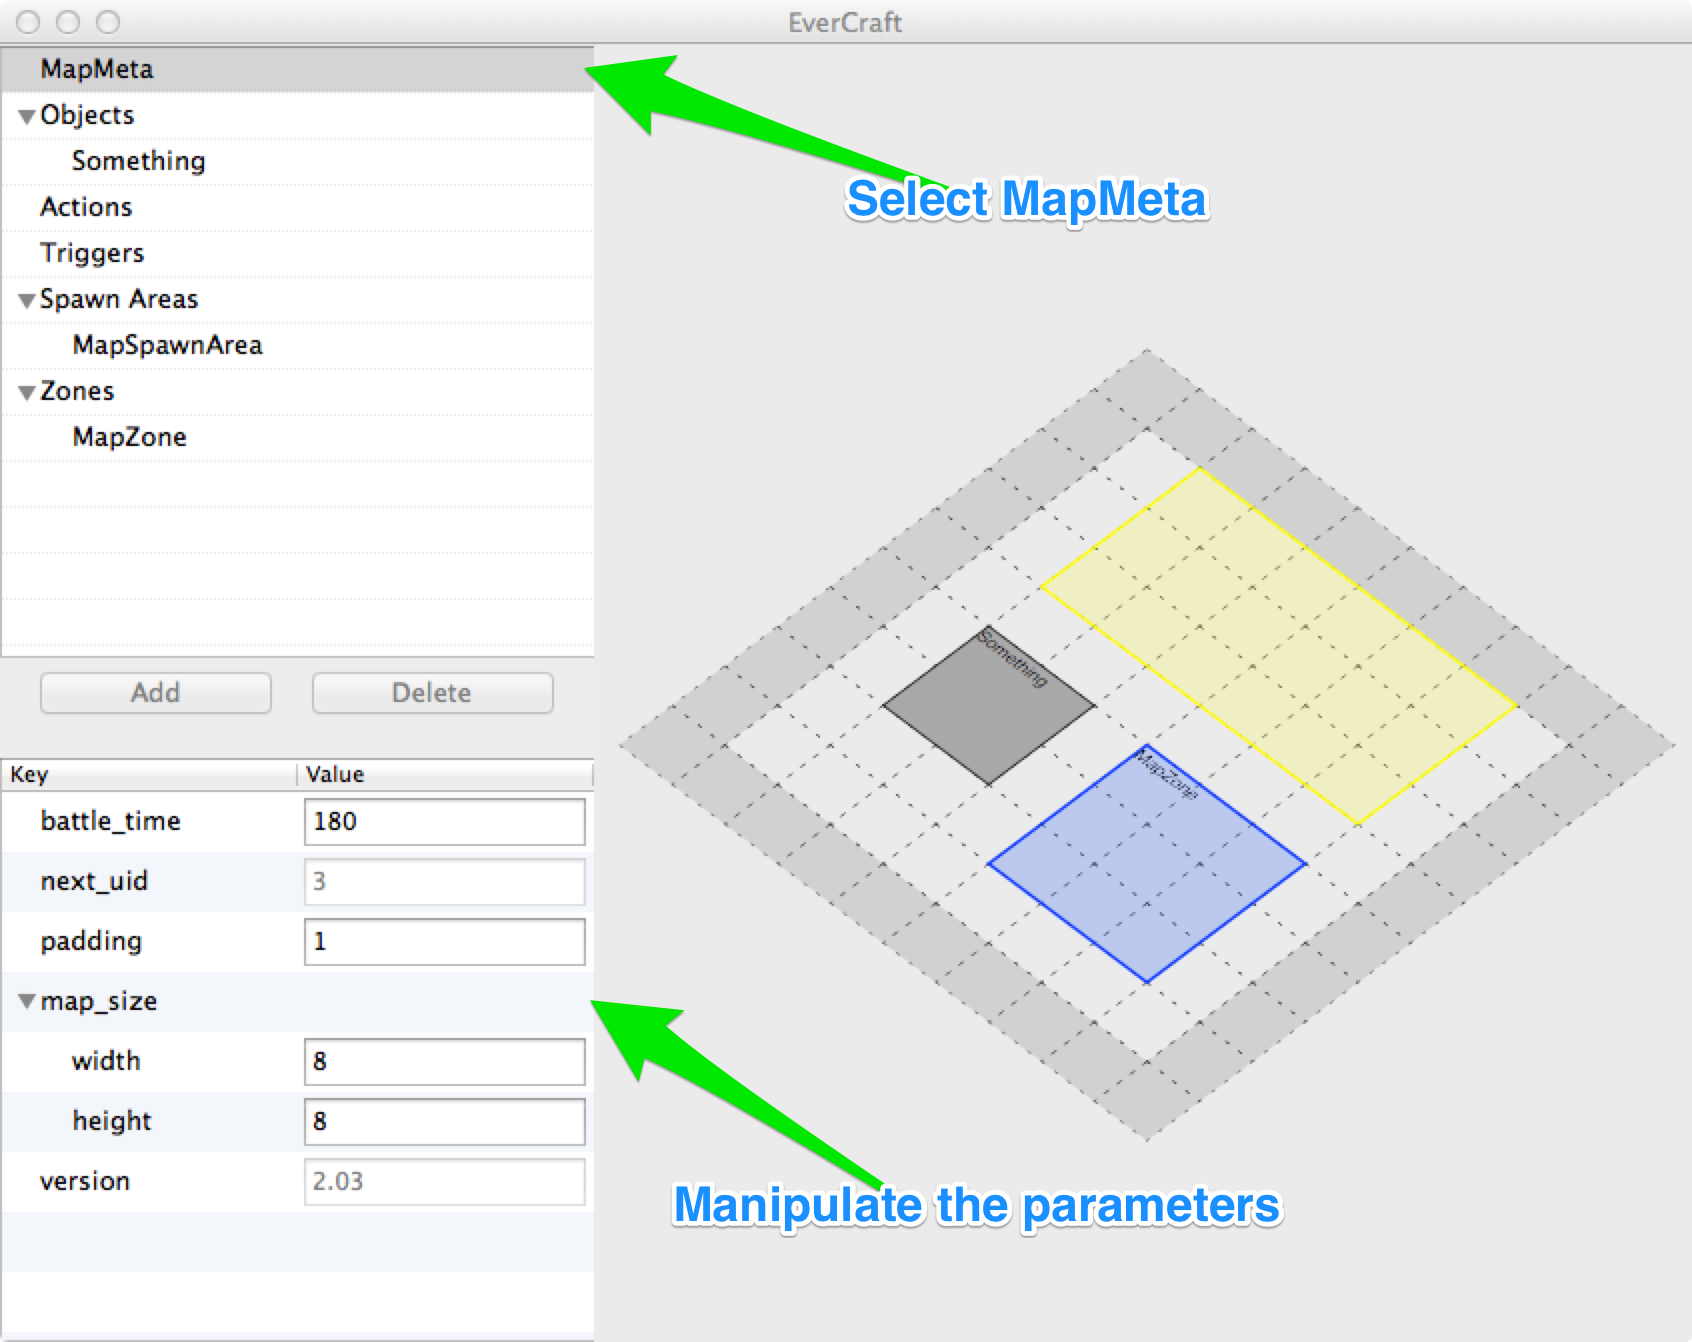
I think this covers the components outline view pretty well (this is what I refer to the outline view we just covered). Moving along, we shall now look at the lower left view, which also happens to be an outline view! The difference, though, is that this one is view-based, and the previous was cell based. Don’t concern yourself with this difference, though. Anyways, this component is referred to as the parameters outline view, since it displays the parameters of an ECObject. Refer to the previous code snippet, and look for the parameters property.
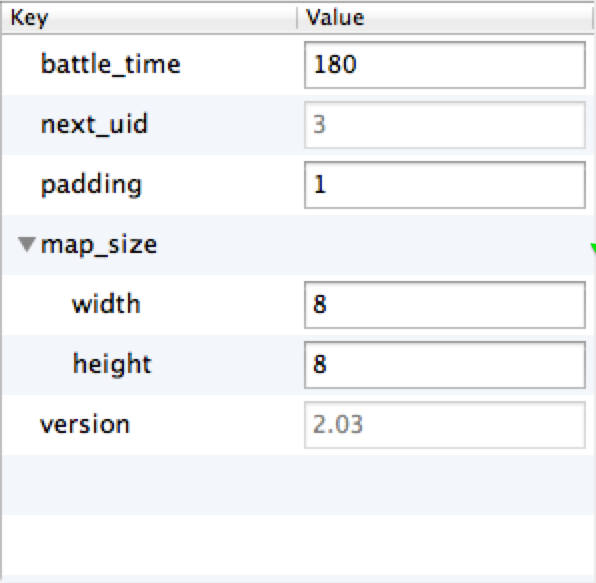 In the MapMeta example on the left, you can see that based on the parameter’s type, we show the appropriate UI component. For example, if the parameter is a boolean, a checkmark is shown. Unfortunately, all we have in this example are numbers, which use an NSTextField component with an attached NSFormatter that makes sure the user enters a valid number. Note how parameters can have children. “map_size” is of type “Size”, which is just a parameter with two child number parameters.
Similar to how we used the ECObject class to represent an object in the components outline view, we use ECParameter class here to represent the objects in the parameters outline view. Since it is pretty much the same procedure, I won’t bother explain it again. However, one interesting part is how the parameters outline view morphs based on the parameter type! I’ll just paste the code that does that. It is located in an NSTableCellView subclass, called ECMorphingCell.
- (NSControl *)_morphToSwitchCell
{
    NSButton *button = [[NSButton alloc] initWithFrame:self.bounds];
    [button setButtonType:NSSwitchButton];
    [button setTitle:@""];

    return button;
}

- (NSControl *)_morphToTextFieldCell
{
    NSTextField *field = [[NSTextField alloc] init];
    return field;
}

- (NSControl *)_morphToNumberInputCell
{
    NSNumberFormatter *formatter = [[NSNumberFormatter alloc] init];
    [formatter setNumberStyle:NSNumberFormatterDecimalStyle];

    NSTextField *field = [[NSTextField alloc] init];
    field.formatter = formatter;
    return field;
}

...

- (NSControl *)_resolveParameter:(ECParameter *)param
{
    id value = param.value;
    NSString *content = param.content;
    NSString *enums = param.enumRef;

    if (content || enums)
    {
        ...
    }

    else if ([value isKindOfClass:[NSString class]])
    {
        self.type = eMorphingCellTypeText;
        return [self _morphToTextFieldCell];
    }

    else if ([value isKindOfClass:[NSNumber class]])
    {
        CFNumberType numberType = CFNumberGetType((CFNumberRef)value);
        switch (numberType)
        {
            case kCFNumberCharType:
                self.type = eMorphingCellTypeSwitch;
                return [self _morphToSwitchCell];

            default:
                self.type = eMorphingCellTypeNumber;
                return [self _morphToNumberInputCell];
        }
    }

    if (value)
    {
        NSLog(@"Warning: unresolved object type: %@", value);
    }

    self.type = eMorphingCellTypeNone;
    return nil;
}
I will only mention that this is all pretty straight forward, except the enum and options type. When the type of a ECParameter is an enum, we need to show a combo box with the available enums. Similarly, if the type is a list of options (strings). This is a bit more involved, were we query the “Model Manager” for these options, and assign them to a combo box so the user can see his options.
DAMN IT!! I PUBLISHED THE POST BY MISTAKE!! I am typing the rest right now…
Anyways, all I have left is the rendering view, which renders all the entities as visual objects the user can interact with. It might look a bit complicated, but it is actually quite simple.
The basic idea behind this is: I subclassed NSView and overrided drawRect: in order to render the Model. Inside the view, I dispatch a timer that calls setNeedsDisplay 2 times per second, so I don’t have to worry about the model changing at all. This is a less efficient polling approach, but works really well, so meh. Then, within drawRect:, I get the model, and do some quartz drawing! I’ll post some code so you can get the main idea:
- (void)drawRect:(CGRect)r
{
    /* Get all the data model */
    NSArray *meta = [[ECDataBank sharedBank] mapMeta];
    NSArray *objs = [[ECDataBank sharedBank] mapObjects];
    NSArray *zones = [[ECDataBank sharedBank] mapZones];
    NSArray *spawns = [[ECDataBank sharedBank] mapSpawnAreas];

    int padding = [meta[@"padding"][@"value"] intValue];
    NSArray *size = meta[@"map_size"][@"children"];
    CGSize mapSize =
    {
        2*padding + [size[@"width"][@"value"] doubleValue],
        2*padding + [size[@"height"][@"value"] doubleValue]
    };
    /* map size is used to compute the transform */
    self.mapSize = mapSize;

    id selection = nil;
    /* render the objects as a box on the tilemap */
    for (NSArray *obj in objs)
    {
        if ([obj[@"isSelected"] boolValue])
        {
            selection = obj;
        }

        rect = [self _rectFromObject:obj];
        [rects addObject:[NSValue valueWithRect:rect]];

        [[NSColor colorWithCalibratedWhite:0.6 alpha:1.0] set];
        [[NSColor blackColor] setStroke];

        CGContextAddRect(ctx, rect);
        CGContextDrawPath(ctx, kCGPathFillStroke);
        /* render the name of the object on the top left */
        CGContextConcatCTM(ctx, [self _textTransfromForRect:rect]);
        [obj[@"name"] drawInRect:rect withAttributes:nil];
        CGContextConcatCTM(ctx, CGAffineTransformInvert([self _textTransfromForRect:rect]));
    }

    ...
}
Actually, there is one really cool and super complicated part in this: The ISO Transform! I am sure you noticed, the map is skewed and rotated. The (0,0) point in the map is the top middle block, which is not the same as the regular cocoa coordinate system, where (0,0) is in the bottom left. We achieve that by transforming the renderer to achieve that ISO look. The biggest challenge is not that, though. It is mapping the mouse events to the transformed coordinates! So, we know that our custom NSView has (0,0) at the bottom left, but we want the mouse to give us (0,0) when we click at the top of the map! We achieve that through affine transforms, which I won’t bother explaining! :D
Conclusion:
Actually, writing about the model of this application will take a while, might as well take that on in part 6… So, make sure you come back for that one, too!